Granny Square Scarf For Dina

2014-05-20 09.28.44

You might have noticed I’ve gone a little crochet mad of late, I’m not even sure why to tell the truth.  I am and always will be a knitter and it kind of feels like I’m having a bit of an affair really.

The crochet is quick, instant colour gratification and in my case, used mostly for items of frippery.

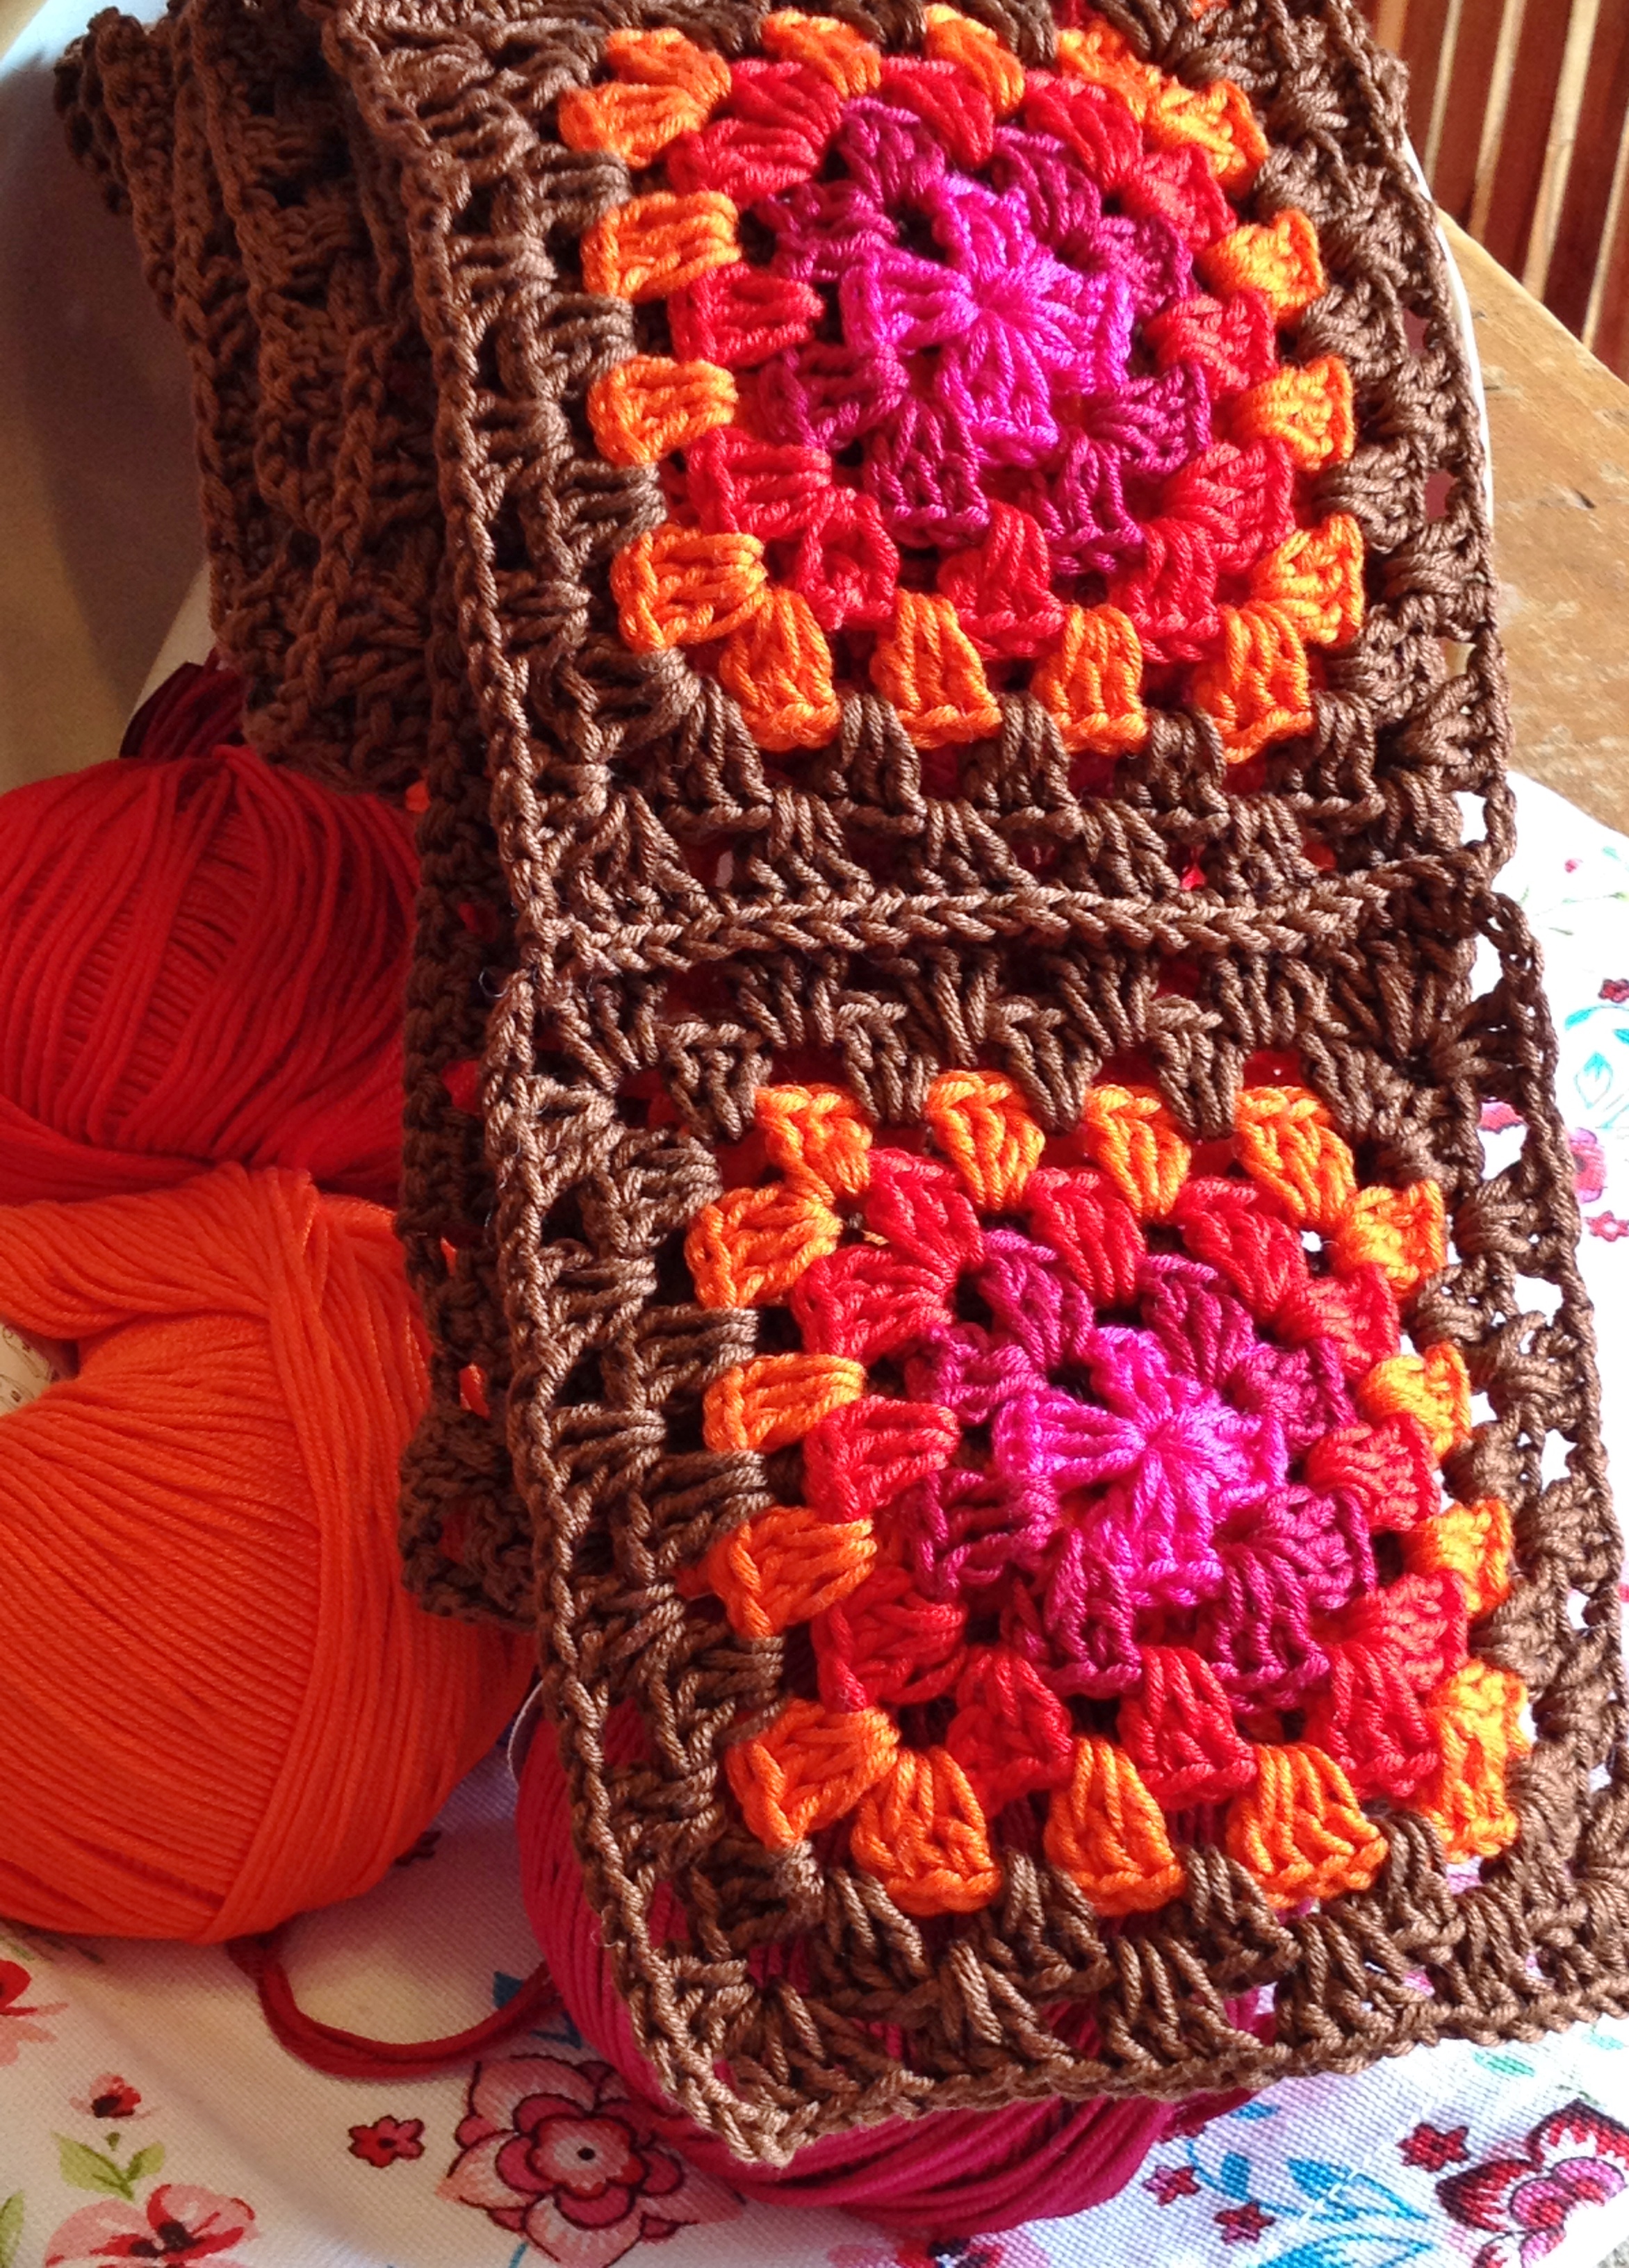
This scarf for Dina, my daughter (she shows up here quite regularly and is equally obsessed by woolly things – she’s been infected) came about when I was helping a customer to select colours for a crochet blanket project.

The aforementioned customer ended up choosing a more pastel combination I’d grouped together whilst I found myself fit to burst with the need to crochet these five up.

Casting the bookwork aside (any excuse)  I set to work on a granny square, still not sure what it would end up being.

I made a couple more squares and it dawned on me that a summer scarf was the way to go.


2014-05-20 09.30.07

First dilemma = How many squares?

It’s a summer scarf so it’s not really for warmth (hopefully).  Originally I thought 15, but after trying it on several times I opted for 13.  Each square is roughly 5″ x 5″ so the scarf is approximately 65″ long.

photo

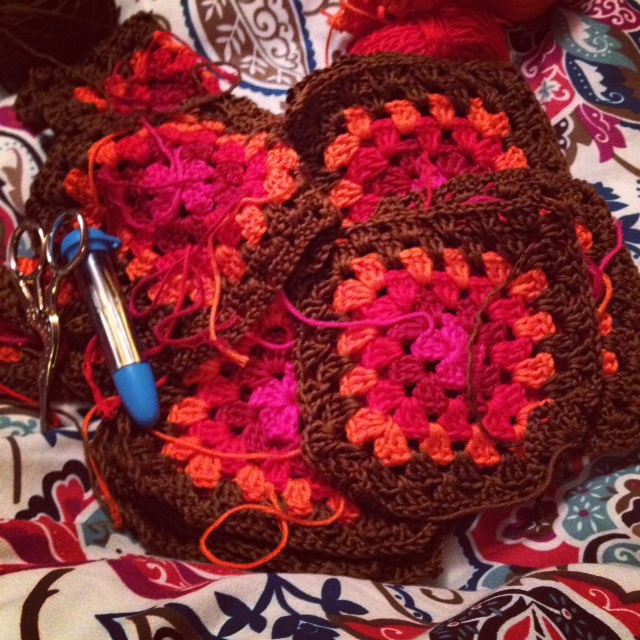
Using all these colours unfortunately equals a lot of ends to sew in and I even found myself taking it to bed on one occasion, refusing to go to sleep until they were all done.

2014-05-20 09.33.12

Not too bad a job, even if I do say so myself.

Second dilemma = How to join the squares?

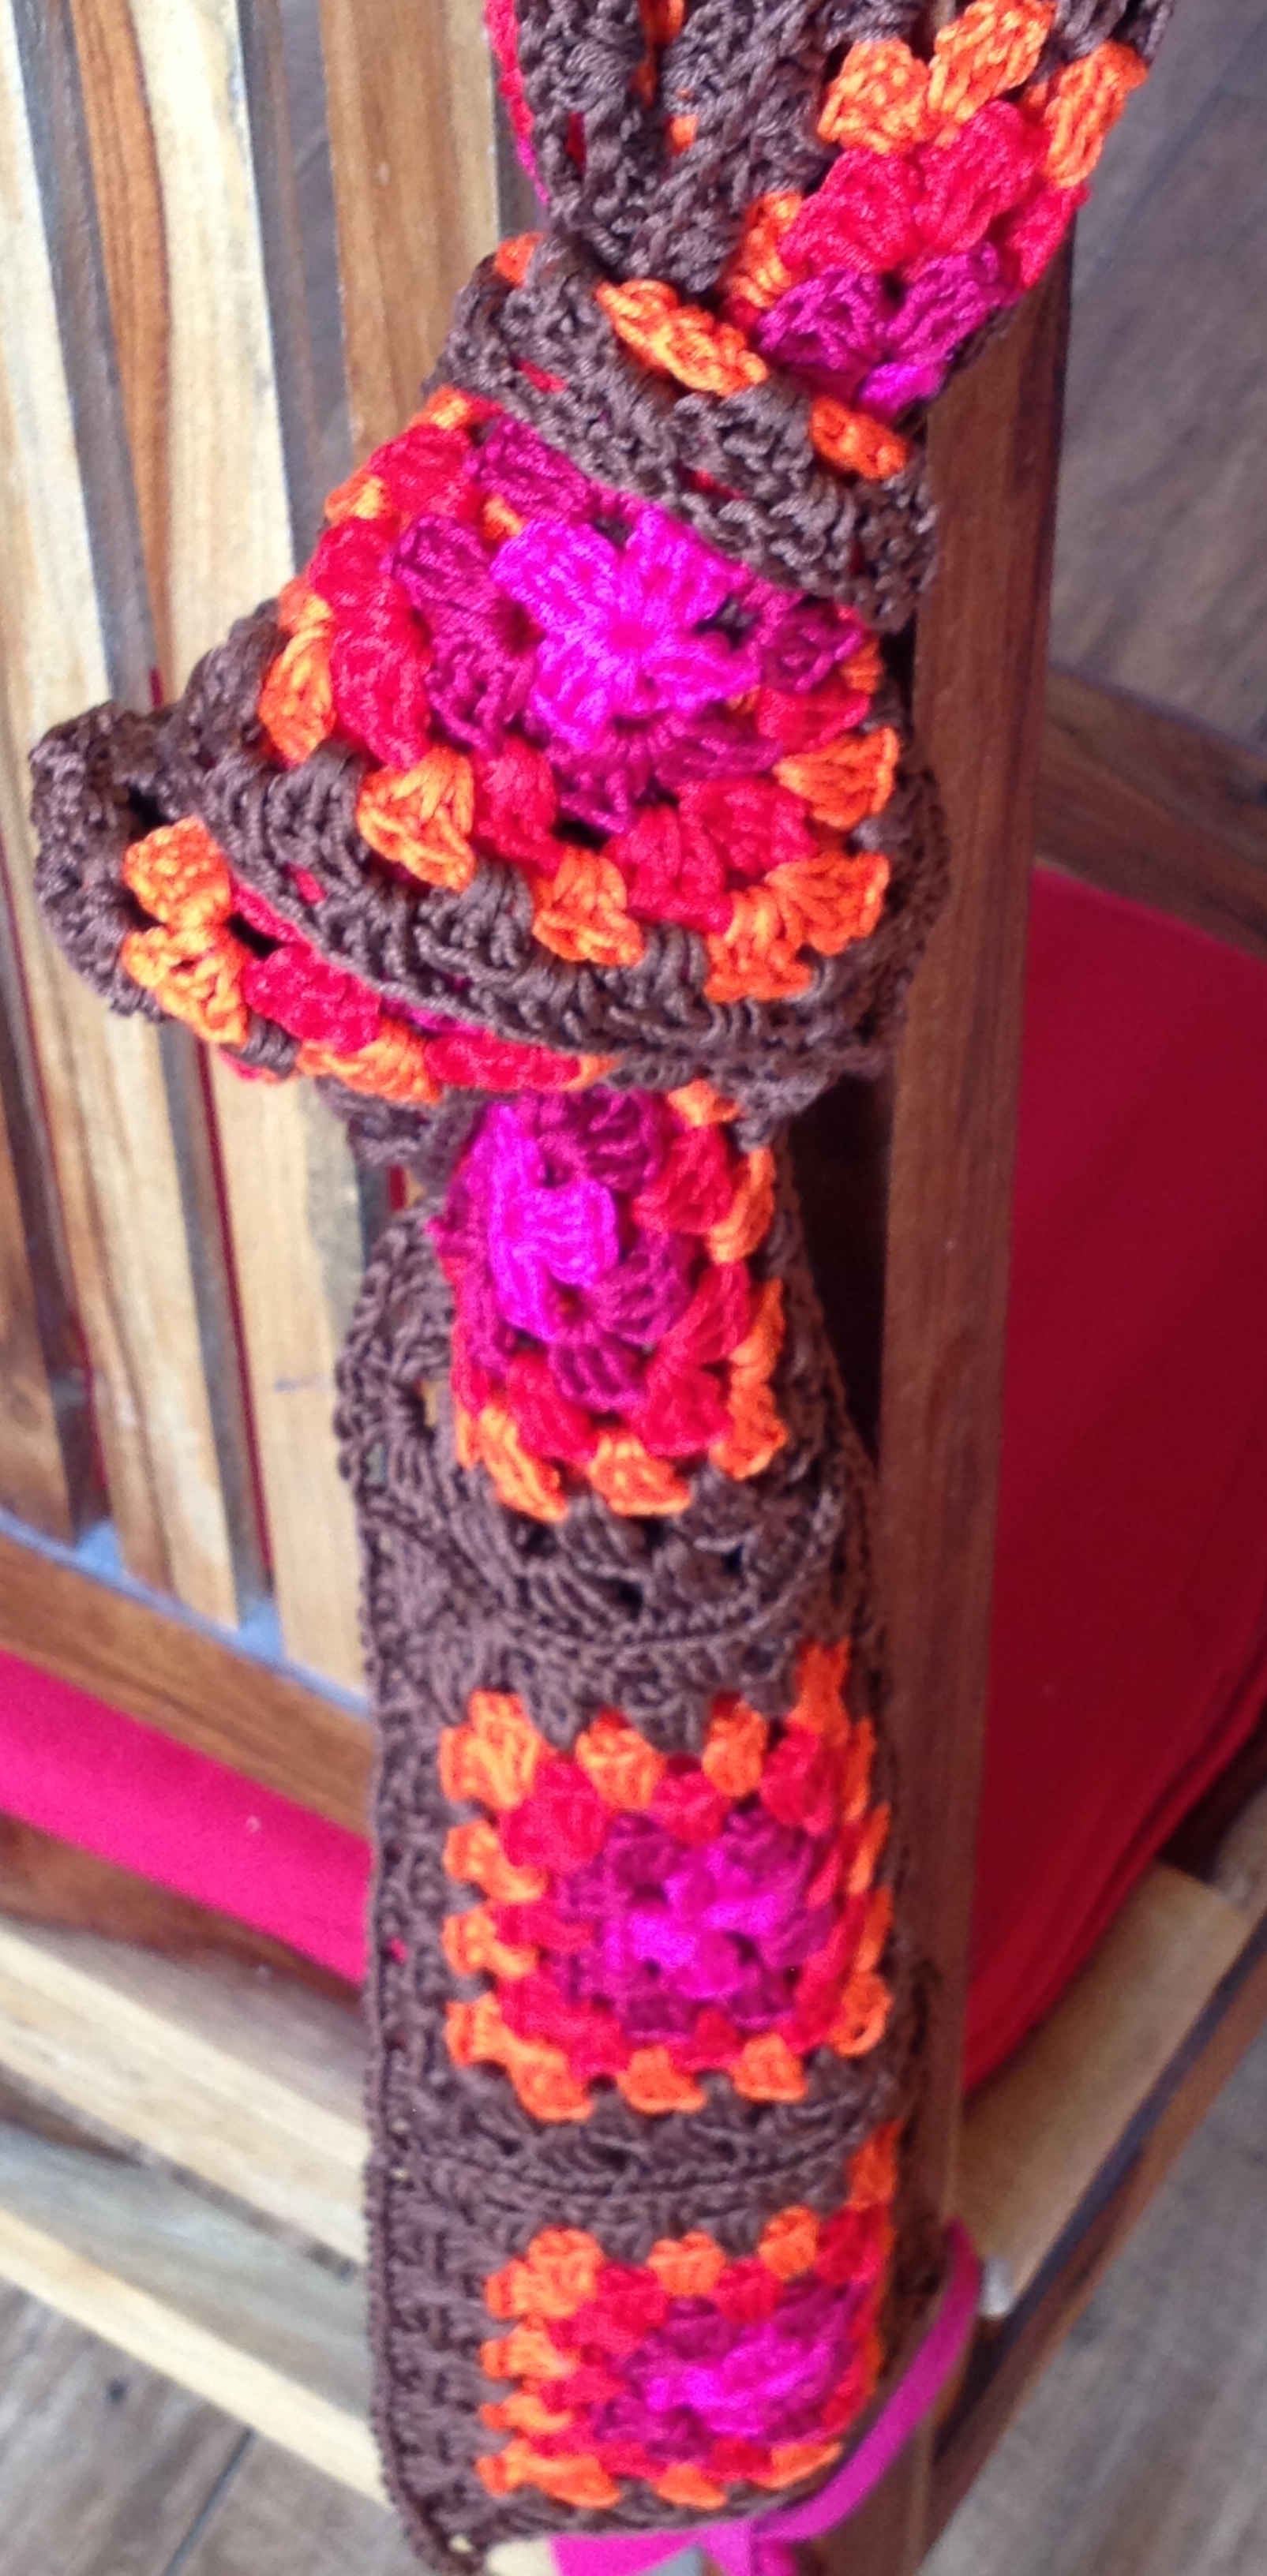
I could have sewn the squares together through the back loops only, mattress stitched them, over stitched them but instead I chose to crochet them together using double crochet.

This has created a beautiful ridge which defines each square and also ads a little weight to the front of the scarf.  Hopefully it will also mean it sits the right way out when worn.

2014-05-19 15.10.53

More ends to sew again, this time whilst waiting in the car for my youngest to come out after school.  This time I refused to drive off until I’d finished. (my poor family)

I’m really happy with the finished scarf and it took very little yarn.  Hopefully my beautiful daughter won’t mind me taking a pic or two of her wearing it for me to share here.  In the meantime I’ve had to use a chair to drape it over.

What do you think?

2014-05-20 09.32.17


Happy Knitting!

Crochet’s fine too though 😉


Have a Look at Wendy Duo

duo ball Last week in my post about Hatti the new knitting concept from Peter Pan, I mentioned that Wendy had an adult version which I was knitting up. The Yarn is available in 5 shades each with a co-ordinating pompom and is made up of 78% Acrylic, 12% Mohair &10% Polyester. Each 100g ball has approximately 200m/218yds of lightweight yarn and costs €9.95

Duo palette

There’s a pattern for the hat and a matching scarf on the reverse of the ball band the hat is lovely and can be worn as a slouchy hat or more like a beanie with a fold over band.

2014-02-06 10.05.52


2014-02-06 10.03.34

Having seen the scarf though I think it looked a bit mean, so I experimented a bit and decided a neck warmer made the best use of the yarn.

2014-02-06 10.02.53

2014-02-06 10.06.25

If you’ve bought a ball of Duo and you fancy knitting up the neck warmer here’s the instructions.

Be sure to make your hat first as per the instructions on the ball band, you’ll find it much easier to use a different yarn to sew up the hat and the neck warmer.

With the remaining yarn and 7mm needles cast on 52 stitches loosely and knit in 2×2 rib (Knit 2, Purl 2) until your work measures approximately 20″/50cm.  Cast off stitches loosely and sew cast on edge to cast off edge using a different yarn.  Sew in ends.

I used 8mm needles to cast on and cast off as it’s important to keep your stitches nice and loose for seaming.

Happy Knitting!

2014-02-06 10.04.48

It’s A Little Nippy – Last Minute Knit

OK.  So we’ve all seen the ‘super quick knit’ patterns that seem like a good idea until you realise that they’re actually referring to those amongst us that can break all kinds of speed knitting records.

I’m a steady knitter, neither fast nor slow and if we’re being extremely honest, I’m prone to distraction.  However, this little neck warmer did actually take a little over an hour to knit up – PROMISE!

So what are you going to need?

2013-12-22 09.58.31

I’ve used 10mm needles and 2 balls of Rico Fashion Elegance in shade 3.  They’re 5ometres each so you need approx 100metres of super chunky yarn.

Cast on 20sts and knit every row in plain/garter stitch until work measures 56cms/22″.  Cast off loosely

2013-12-23 12.03.08I slipped the first stitch of every row to keep my edges tidier but it’s not necessary.

2013-12-23 12.03.30

Join by sewing your cast on and cast off edges together.

Ta ddah……..

2013-12-23 13.32.05

Of course now my neck’s warm but I can’t see a blooming thing.

2013-12-23 13.45.24

Much better.

I’m going to make a couple for my youngest to wear as he always forgets to put a scarf on and I’m sure my hubby whose a plumber and constantly working outside on dairy farm installations at the moment, might even fancy a couple.

In case your wondering it’s 20cm/8″ deep.

Happy Knitting!


I’ve Gone Pro (apparently anyway)

2013-10-05 12.31.19
Super Chunky Tea Cosy

OK, as most of you know I knit. In fact, I knit as often as I can (love me, love my knitting) and would love to be a guinea pig if they ever discover a way for you to do it in your sleep.

In addition to the knitting of other people’s patterns, I always have loads of my own ideas sloshing around in my head.  Some of these make it onto scraps of paper or into notebooks and then, if I have the time, a few of them end up being tested

I’ve popped a few of these ideas up on here in the past and my Easy Lace Scarf has been quite popular.  However, in an attempt to become better at this side of my business a friend suggested I take the designing to the next level.

Based on her suggestion I’ve just opened up a Pro account on Ravelry to begin selling some of my designs and the first one to go up is my Super Chunky Tea Cosy.  I’m not interested in making any real money from the patterns but acknowledge that if I ever get to write the book I want to, I can’t have all of my patterns available online for free.

My Super Chunky Tea Cosy pattern costs €2.50 and I hope it will be the first of many designs.  If you like the style perhaps you could be persuaded to go and add it to your favourites and if you’re interested in purchasing a copy, just click here.

It’s knitted with Super Chunky yarn on 10mm needles and takes no time and very little wool (approx 70 metres without the pompom).  Who knows you might even have some stashed yarn just lingering for such a project.

Tea cosies are one of the most requested patterns in the shop so it seems a great place to start.

Happy Knitting!

2013-11-06 21.42.23

Moody Blanket Update

I thought it was time to update you all on the progress of my ever increasing blanket which is now 54.5″/138cms.  As you can probably imagine knitting the 2 rows per day is taking much longer now on account of the blankets size.  To be on the safe side I need to make sure I have three quarters to an hour spare when I start to knit.  Unfortunately, our weather is anything but May like which has inadvertently been a godsend as there is some warmth from the blanket.

Sitting under the weight of it whilst knitting in heat is not great.

I think I have a little over a months worth of knitting left before I’ll reach my target length of 6 foot.

In order for you to judge the length and to give you a bit of a giggle you can see me modelling the blanket so far.  I’m 5ft3 on a good day.

010

Super Chunky Mistake Rib Cowl

081

Having managed to persuade my usual model to pose for a picture, you can no doubt see how she feels about it.

Mistake rib is a great stitch pattern to use for scarves/cowls as it gives you a double sided fabric rather than one with a definite front and back (like stocking stitch).  The easiest way to remember the pattern is to cast on an odd number of stitches, in this instance I used 17.  With an odd number of stitches every row of your scarf will be the same.

085

We managed to wrap the cowl around Dina 3 times, but the friend it was made for is very tall and tends to wear it wrapped round her neck twice.  if you want to make it wider and a little shorter cast on 2 extra stitches (the pattern remains the same).

Cowl  Dimensions

Length 180cm/70″

Width 23cm/9″

Materials

5 Balls Sirdar Big Bamboo

10mm Needles

Darning Needle

Abbreviations

k – knit

p – purl

st(s) – stitch(es)

Pattern

Using thumb method cast on 17 stitches.

Work every row as follows – knit 2 stitches, purl 2 stitches repeat these 4 stitches to last st, K1

Work until almost all of your yarn has gone ensuring you save enough to cast off loosely (approximately 3 times the width of your knitting).

Sew cast on edge to cast off edge in order to make a large ring and sew in ends.

Tip – When joining in a new ball of yarn try to do this somewhere along the row rather than at the beginning of a row as usual.  This will help to keep the edges of the cowl tidy and means your ends can be better hidden.

Moody Blanket Pattern

020

Blanket Dimensions

Length 72″/183cm (hopefully)

Width 7.2″/183cm (hopefully)

Materials

2 strands of aran weight yarn are used held together.
You will need approximately 2400 metres of your base yarn and then the same amount again in your chosen combination of yarns.  I am using Sirdar Bonus Aran and Sirdar Bonus Aran Tweed and will need 3 x 400g balls of my base shade 929 and probably 2 x 400g of shades 822 & 817 and 1 x 400g of 994.  (I will have loads left for charity knitting)

You will also need around another 20 to 50 metres (doubled) to work your applied i-cord if doing so at both your cast on and cast off ends.

I also used scrap super chunky yarn for my provisional cast on and a 12mm crochet hook.

8mm Needles

Darning Needle

Tension

12sts x 18rows on 8mm needles with 2 strands of aran weight yarn held together in garter stitch

Abbreviations

k – knit

st(s) – stitch(es)

co – cast on

wyif – with yarn in front

sl – slip next st

sl3 – slip next 3 sts (for applied I-cord)

psso – pass slipped stitch over

K3tog – knit next 3 sts together

Applied I-cord cast off –

*k2, sl 1 k-wise, k1 (this will be 1 of your live sts at the cast off end or from the provisional cast on), psso, sl all 3 sts back onto left needle and rep from* until all sts have been worked.  Three I-cord sts remain on needle, K3tog, break yarn and draw through your final st.

Pattern  

For the i-cord edge you need to use a provisional cast on method and you want 222 sts for the blanket.

I prefer to use the crochet chain provisional cast on, so I chained 228 sts with a 12mm hook and super chunky yarn.

1st row – knit all stitches

For every subsequent row you knit until the last 3 sts, wyif sl3

I’m hoping to knit at least 324 rows or 162 garter stitch ridges. I shall be knitting 2 rows per day.

The I-cord edge is optional. If you are making the blanket without it – using thumb method and holding the 2 strands of yarn together cast on 216 sts and knit every row without slipping the last 3 sts.

If you follow the instructions in Moody Blanket part 1 & 2 you will hopefully end up with a beautiful and personal blanket.

I shall be using an I-cord cast off on my cast on and cast off edges.  Work on your cast off edge first by CO 3 sts using cable cast on method, work I-cord cast off as per instructions above.

Slip cast on sts onto needle and work as for cast off end above.

Sew in your ends, hiding them in the I-cord if you’ve chosen to make it.

This is what my blanket looks like after 2 days

013

Saturday was a good day whilst Monday was just ok.  The red is my provisional cast on yarn.  I shall try to update on the blankets progress weekly.

Happy Knitting!

Heart Decoration

Little hanging heart

(Bleeding awful photos again ain’t they? Sorry! Said in my South East London accent of course)

Size (approx)

Width at widest point 11cm

Height from top of curve to point 9.5cm

Materials

A pair of 4mm needles

Rico Cotton Aran any colours

Darning Needle

Toy stuffing

A 4.5mm crochet hook or ribbon

Abbreviations

St(s): Stitch(es)

K: Knit

P: Purl

Alt: Alternate

Tog: Together

S1: Slip 1 stitch

PSSO: Pass slipped stitch over

M1: Make 1 – From the front, lift loop between stitches with left needle, knit into back of the loop.

K2tog: Knit the next 2 sts together

K3tog: Knit the next 3 sts together

P2tog: Purl 2 sts together

p2togtbl: Purl 2 sts together through back loops

SSK: Slip, slip, knit slipped stitches tog.

Heart – Make 2 pieces

Ornament is knitted in stocking stitch – knit 1 row, purl one row

Using 4mm needles and shade A cast on 3sts.

Work 2 rows in stocking stitch

3rd row: – Using shade B, k1, m1, k1, m1, k1

4th row: – purl

5th row: – Switch to shade A, k1, m1, k3, m1, k1

6th row: – Purl

Continue working 2 row stripe sequence, increasing by 1 stitch at each end on the next and every alt row until there are 21 sts.  Work 3 more rows ending with a purl row.

Decreases

Continue working in 2 row stripe sequence except for the last 3 rows, work these and the cast off in the same shade.

1st row: – k1, ssk, k7, turn. (9sts)

Working on these stitches only slip the remaining 11 sts onto a small stitch holder

2nd, 4th and 6th row: purl

3rd row: k1, ssk, k6. (8sts)

5th row: k1, ssk, k2, k2tog, k1. (6sts)

7th row: k1, ssk, k2tog, k1. (4sts)

8th row: P1, p2togtbl. (3sts)

9th row: S1, k2tog, psso, cast off remaining stitch.

Rejoin yarn to remaining sts

1st row: k2tog, k until there are 7 sts on right hand needle, k2tog, k1. (9sts)

2nd, 4th and 6th row: purl

3rd row: k6, k2tog, k1. (8sts)

5th row: k1, ssk, k2, k2tog, k1. (6sts)

7th row: k1, ssk, k2tog, k1. (4sts)

8th row: p1, p2tog, p1. (3sts)

9th row: k3tog, cast off last stitch.

You need to make a braid to hang the ornament.  I crochet 18 chains on a 4.5mm crochet hook, but you could knit a braid, plait some wool or use a piece of ribbon.

Place the hearts right sides together and sew up using a backstitch, remember to sew over your braid in order to hang your ornament.  Sew 90% of the way round, sew in and trim ends except the one you’re using to sew up.

Turn heart right sides out, stuff, if you insert the filling a little at a time you will achieve a more even fill.

Sew up remaining opening.

Christmas Wreath

They look great on a plain tinsel wreath like this.  Those of you that know me will know I prefer odd numbers so there is one missing!!!!!  The wreath was from a euro shop and cost €7 I think.

I love using Rico Creative Cotton Aran for these decorations as it comes in such a wide range of colours and it’s easy on the pocket;however, I’ve also made a good few of these little hearts in sock wool with 2.5mm needles.  Once made I omitted the hanging braid, opting instead to put them in a little felted bowl as a gift.  They work equally well for Christmas, Valentines or for when you just want to let someone know you appreciate them.  They’re quick and easy to knit and can be decorated with buttons and sequins to jazz them up a bit if you like.

They look pretty in plain colours too.

Chunky Basket Rib Hat

Before you read on I feel I owe it to you to apologies in advance for the terrible photos, I keep taking more and they’re just not getting any better because of the glare of the sequins.  A good few of you will have seen me wearing the hats by now so hopefully you know what they look like.

I’d been dying to use the sparkly, sequined, chunky yarn ‘Galaxy’ from Rico when it first came in last year and finally decided to make a hat (no surprises there).  It’s fair to say I’m a little bit of a hat lover, obviously since having the shop they now tend to be of the knitted kind, but I love all hats.

My first hat purchase when I was about 13 was a vintage purple hat from the 1920’s which I absolutely adored – not sure what became of it.  Since then there have been trilby’s, cloches, flat caps, beanies both bobbled and not,70’s styled huge hats, straw ones, berets and slouchie ones I JUST LOVE EM ALL!

It shouldn’t come as a shock to find out that I love knitting them too, their quick to knit and can be great way to show of the most intricate of patterns or ‘over the top yarns’ that you just wouldn’t make a whole garment in. There also ideal to give as a gift.  Every year I think I have enough of them and then the madness sets in and I have to make more……….

So here’s my chunky beret in Rico Chunky Galaxy

Hat Size

To fit the average sized woman’s head, at least I think my head is of average size?

The blue hat is approximately 21cm/8.5″ high, whilst the purple one is 19cm/7.25″

Tension

14 stitches x 19 rows in stocking stitch

Abbreviations

k – knit

p – purl

st(s) – stitch(es)

s1 – slip stitch

k2tog – knit the next 2 stitches together

yf – move yarn forward to front of work

yb – move yarn to back of work

Materials

2 x 100g balls Rico Galaxy Chunky

The purple/green hat only took 1 ball whilst the blue hat used about a quarter of the 2nd ball

5mm & 6.5mm needles

Darning needle

Basket Rib Pattern

1st Row (rs) – Knit

2nd Row – Purl

3rd Row – K1 *s1 purlwise, k1: repeat from * to end

4th Row – K1 *yf, s1 purlwise, yb, k1: repeat from * to end

These 4 rows make up the basket weave pattern

Directions

Using thumb method and 5.5mm cast on 73 stitches.

1st Row – k1, p1 to last st k1

2nd Row – p1, k1 to last st p1

Repeat these 2 rows 2 times more and row 1 once more (you will have worked 7 rows in total)

8th row – k2, m1 to last 3sts, rib 3 (109 sts)

Change to 6.5mm needles and begin working basket weave pattern.  The purple hat took 6 sets of repeats and the blue hat took 9 repeats.

Shape crown

Decrease Row 1 – k4, k2tog to end (91sts)

keeping pattern correct work 3 more rows

Decrease Row 2 – K3, k2tog (73sts)

work 3 more rows of pattern

Decrease Row 3 – K2, k2tog (55sts)

work 3 more rows of pattern

Decrease Row 4 – K1, K2tog (37sts)

work 3 more rows of pattern

Decrease Row 5 – K2tog (19sts)

purl 1 row

Final Decrease Row  – K2tog (10sts)

Leave approximately 12″ of yarn, cut and thread through remaining 16sts using a blunt tipped darning needle to secure.  Sew seam

Leave approximately 12″ of yarn, cut and thread through remaining 8sts using a blunt tipped darning needle to secure. Sew seam.

My Favourite Easy Lace Scarf

Kid Silk Old Shale Scarf

I have no idea where the time this week has run away to, I feel even more behind than usual and it’s only Monday?  Having promised to post this pattern up a good while ago now I thought I should finally try and get round to it.

I think it is one of the simplest and most effective lace scarf patterns which lends itself so well to lots of different yarns however, I think it looks prettiest in a mohair.  Rowan’s Kidsilk Haze is beautiful, but to be fair it is a little expensive.  Kid Silk from Austermann is the same great yarn but a little kinder on our ever-suffering pockets.

You Will Need

1 Ball of Austermann Kid Silk

5mm Needles

Darning Needle

Scarf Dimensions (unblocked)

Length 140cm/55″

Width 20cm/7.9″

Tension

There’s no specific tension for this piece – you want it to be looser than you would usually work the yarn.  For example if you’re working with a double knit and your tension is usually 22sts on 4mm (average) you would need 5mm’s.  The Kid Silk has a ‘haze’ which means it will hold much more than some other yarns, allowing you to use much larger needles than you would do normally.

I have a friend who makes this same scarf but on 8mm’s and it looks really pretty so you can experiment with your needle sizes.

Abbreviations

k – knit

p – purl

st(s) – stitch(es)

ws – wrong side

y0 – yarn over

k2tog – knit the next 2 stitches together

Pattern

Cast on 40sts loosely and work 4 rows in plain knit, this creates the garter stitch border.

The garter stitch border

1st Row – Knit

2nd Row – Purl

3rd Row – Knit the first 2 stitches, (K2tog) x 3, (yo, k1) x 6, (k2tog) x 6, (yo, K1) x6, (k2tog) x3, knit last 2 stitches.

4th Row – Knit

These 4 rows form the pattern work until scarf reaches your chosen length, remembering to leave enough yarn to knit the 4 rows of plain stitch at the end of your scarf.

Cast off loosely and sew in ends.

The garter stitch edge

By knitting the first and the last 2 stitches on every row the garter stitch border runs the whole way round the scarf.

Block if desired.

As I already mentioned I love this pattern and one of my favourite scarves was made for me by my good friend Sandra.  She used exactly the same pattern but knitted with Rico Essentials Cotton DK.

Old Shale Scarf in Rico’s Essential Cotton DK

This version was knitted in Baby Alpaca by King Cole.

Baby Alpaca from King Cole

Have a play with different weights of yarn remembering to keep your needles at least 1 size larger than the size given for the yarn.  We’d love for you to post pictures of your finished scarves up on the Facebook page www.knitinmidleton.com

Happy Knitting!